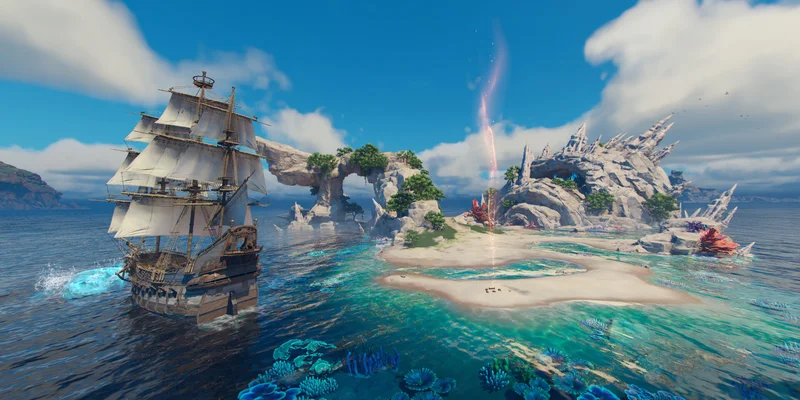
- Sea of Remnants character creation focuses on puppetfolk faces, hair, makeup, and outfits.
- Start with a preset if you want a fast foundation before using detailed engraving sliders.
- Prioritize eyes and hair because they make the largest visual difference to character personality.
- Use color controls carefully to adjust brightness and saturation without needing full RGB editing.
- Finish with the showcase to test lighting, emotes, poses, and close-up screenshots.
Sea of Remnants character creation overview
Sea of Remnants character creation is built around the game’s distinctive puppetfolk identity rather than conventional human character models. The system lets you shape a character’s face, select wood color, change hair and facial details, apply makeup or markings, and complete the look with pirate-inspired clothing. Body customization is limited compared with the face, so the most important decisions happen in the head and styling menus.
The creator supports both male and female puppetfolk models. Their available hairstyles, makeup selections, and facial presets are not identical, while outfits, hats, and eye patches appear to follow a shared structure. This gives each model a recognizable visual direction while leaving enough room for unusual or highly expressive designs.
Video Highlights:
- Initial questions can award a cosmetic helmet or hat.
- Wood color changes the puppetfolk’s base appearance and texture.
- Engraving provides detailed control over facial proportions.
- Hair, eyes, makeup, and asymmetrical features strongly affect personality.
- The final showcase includes lighting, emotes, UI hiding, and zoom controls.
Treat the preset as a starting point, not a final appearance. The strongest designs usually combine a preset with small changes to the jaw, eyelids, brows, mouth, and color values.
Character creation flow
| Stage | Main choices | Best use |
|---|---|---|
| Opening questions | Cosmetic helmet or hat | Choose answers for a small personalized bonus |
| Base model | Male or female puppetfolk | Establish the overall silhouette and styling direction |
| Wood color | Pale, dark, red-toned, and other textures | Set the character’s foundation |
| Face preset | Ready-made facial designs | Create a fast visual identity |
| Engraving | Face, eyes, nose, mouth, ears | Refine proportions and asymmetry |
| Styling | Hair, color, makeup, markings | Add personality and visual contrast |
| Outfit | Clothing, hat, eye patch | Complete the pirate-inspired look |
| Showcase | Lighting, emotes, camera controls | Review and capture the finished character |
Base model, wood color, and facial presets
The first major choice is the puppetfolk’s wood color. Although it functions similarly to a skin-tone selector in other character creators, the setting is presented as a wood selection. Different options change the character’s surface appearance and texture, including pale, dark, and red-toned choices.
For a reliable first character, choose a medium or neutral wood color before experimenting with more dramatic shades. A neutral base makes it easier to judge hair, makeup, markings, and outfit colors. More unusual wood colors work well when the rest of the design uses restrained styling.
After selecting the wood color, choose a facial preset. Presets are more than minor variations: they can change the overall mood, eye shape, facial proportions, makeup, hair direction, and decorative effects. Some designs are serious, while others lean into the quirky and theatrical side of the puppetfolk concept.
| Customization area | What it changes | Recommended approach |
|---|---|---|
| Wood color | Base material tone and texture | Pick the base first so later colors are easier to judge |
| Face preset | Overall facial identity and starting style | Choose one with features you already like |
| Forehead | Width, height, depth, and placement | Make small changes to avoid flattening the face |
| Cheekbones | Facial width and contour | Use moderate adjustments for a natural silhouette |
| Jaw | Width and height | Adjust this before fine-tuning the chin |
| Chin | Width, depth, height, and side-to-side position | Use asymmetry for a more distinctive puppetfolk look |
How engraving works
Engraving is the detailed sculpting layer of the creator. It is available after selecting a preset and lets you move individual facial areas with sliders. The system provides more control over the jaw and chin than many basic character creators, including side-to-side chin movement.
The best method is to change one area at a time. Move a slider, rotate the preview, and then compare the result with the original preset. Large changes across several categories can produce a dramatic result, but small adjustments are easier to control and refine.
Engraving values can stack together. A small change to the jaw, cheeks, chin, and forehead may become a major redesign, so review the entire face after every group of adjustments.
Hair, eyes, makeup, and facial expression
Hair and eyes are the strongest personality tools in the creator. Hair styles vary between the male and female models, and the female selection appears to offer more elaborate designs and additional movement. Some preset appearances may not be represented identically in the later style menus, so check the full selection before committing to a look.
Hair color uses a curated palette instead of unrestricted RGB controls. Choose a base color, then adjust brightness and saturation. Raising both sliders creates a more vivid result, while lowering saturation can produce muted or near-black styles. This system provides broad flexibility without requiring a separate color wheel.
The eye presets can change the character’s mood immediately. Serious, playful, unusual, and exaggerated options are available. Eye engraving then allows more precise adjustments, including width, height, rotation, scale, depth, and eyelids. Eyelid changes are especially important because they can make the character appear more alert, suspicious, compassionate, or mischievous.
| Feature | Available control | Design impact |
|---|---|---|
| Hair style | Style selection and model-specific options | Defines silhouette and visual theme |
| Hair color | Palette, brightness, saturation | Controls contrast and overall mood |
| Eye preset | Distinct eye shapes and expressions | Establishes personality quickly |
| Eye engraving | Scale, rotation, width, height, depth | Refines expression and facial balance |
| Eyelids | Multiple adjustment points | Changes mood more than expected |
| Brows | Position and shape adjustments | Adds concern, confidence, anger, or humor |
| Makeup | Styles, markings, and color adjustments | Creates contrast and decorative identity |
Makeup and markings
Makeup is not limited to conventional cosmetics. Depending on the selected model, the menus can include decorative patterns, glitter-like effects, scars, bruises, gills, horns, lightning-style markings, flowers, and other fantasy details. Male and female models do not necessarily share the same selections.
Use makeup as a final expression layer. If the face already has a strong eye preset, choose a lighter marking so the features remain readable. For a simpler design, remove most makeup and let the wood texture, hair, and outfit carry the visual identity.
Serious Navigator
- Neutral wood color
- Controlled jaw engraving
- Restrained makeup
- Dark or muted hair
Quirky Explorer
- Asymmetrical chin or mouth
- Expressive eyes and brows
- Bright hair color
- Unusual markings
Theatrical Pirate
- Bold hair silhouette
- Glitter or dramatic makeup
- High-contrast wood color
- Hat and eye patch combination
If the character feels lifeless, change the eyes first, then the eyebrows. These two elements usually communicate more emotion than a large number of minor face adjustments.
Step-by-step character creation workflow
Follow this sequence when creating a character for the first time. It keeps the major decisions separate and reduces the chance of making a detailed face that no longer works with the final hairstyle or outfit.
Complete the opening questions
Play through the opening question segment and note the cosmetic helmet or hat awarded by your answers. The reward is primarily a visual extra, so choose answers based on the result you want to test rather than treating it as a major progression decision.
Choose the model and wood color
Select the male or female puppetfolk model, then pick a wood color. Begin with a neutral option if you want to evaluate facial details clearly. More unusual red-toned or very dark choices can be tested later.
Select a facial preset
Browse the presets before opening engraving. Compare the eyes, face shape, hair direction, and built-in decorative details. Choose the preset that is closest to your intended concept.
Engrave the face
Adjust the forehead, cheeks, jaw, chin, eyes, eyelids, brows, nose, mouth, and ears. Make changes gradually, and use asymmetry when you want a less conventional puppetfolk design.
Add styling and review the showcase
Choose hair, colors, makeup, outfit, hat, and eye patch. Finish in the showcase menu, where lighting, emotes, camera zoom, and hidden interface options help you inspect the final result.
| Workflow pass | Questions to ask | Stop condition |
|---|---|---|
| Identity | Does the wood color fit the intended character? | Base tone is readable with neutral lighting |
| Structure | Does the face still look balanced from multiple angles? | Jaw, chin, and nose do not overpower each other |
| Expression | Does the character communicate a clear mood? | Eyes and brows support the concept |
| Styling | Do hair and makeup improve the face? | Details remain visible instead of competing |
| Presentation | Does the outfit match the character’s identity? | Showcase lighting confirms the final colors |
Do not spend too long on makeup before selecting hair. Hair changes the visible shape of the face and can hide the ears, brows, or parts of the forehead.
Outfits, hats, eye patches, and showcase controls
Outfit customization is comparatively straightforward. After completing the face and styling menus, select from the available pirate-inspired outfits, then choose a hat and an eye patch if desired. The clothing choices provide a strong finishing layer, with different colors and silhouettes that can make the same face feel more adventurous, elegant, or eccentric.
The body itself has limited direct customization in the character creator. This makes the outfit especially important because clothing contributes much of the final silhouette. For that reason, check the complete look rather than judging the face in isolation.
The showcase menu is the final review area. It allows you to inspect the character using different lighting conditions, emotes, actions, zoom levels, and hidden interface settings. Use this section to verify that colors remain clear in both bright and darker presentations.
| Final element | Primary purpose | Review tip |
|---|---|---|
| Outfit | Establishes the finished silhouette | Compare all available clothing options before choosing |
| Hat | Adds a strong pirate or adventure accent | Check whether it hides important hair details |
| Eye patch | Adds asymmetry and character flavor | Use it only if it supports the face design |
| Lighting | Tests color and material readability | Review more than one lighting option |
| Emotes | Shows the face in motion | Confirm the expression still works outside the editor |
| Zoom controls | Supports close-up inspection | Check eyes, makeup, nose, and mouth details |
| Hidden UI | Creates a clean presentation | Useful for screenshots or sharing the design |
Final Character Review:
- Choose a wood color that supports the intended theme
- Confirm the jaw, chin, nose, and mouth remain balanced
- Review the eyes, eyelids, and brows from multiple angles
- Check hair, makeup, hat, and eye patch together
- Test lighting, emotes, zoom, and hidden UI in the showcase
Use the showcase lighting to test contrast before saving a final appearance. A color that looks clear in the editor may appear much darker or brighter under a different presentation setting.
Common questions about character customization
The creator’s strongest feature is its combination of a memorable art direction and detailed facial controls. It is not designed around unlimited body sliders; instead, it puts most of the customization depth into the puppetfolk face, expression, hair, markings, and clothing.
Q: What is the main focus of Sea of Remnants character creation?
The main focus is puppetfolk facial customization. Players can choose wood color, presets, engraving options, hair, eyes, brows, makeup, nose, mouth, ears, outfits, hats, and eye patches.
Q: Can male and female puppetfolk use exactly the same styles?
Not always. The two models have different hairstyle and makeup selections, while outfits, hats, and eye patches appear to follow a more shared structure.
Q: Can I make an asymmetrical character?
Yes. Several engraving controls support separate or side-to-side adjustments, including the chin, nose, mouth, eyes, and ears. Small asymmetrical changes can create a distinctive puppetfolk design.
Q: Does the creator support full RGB color selection?
The available system uses a curated color palette with brightness and saturation controls rather than unrestricted RGB editing. It still supports a broad range of vivid, muted, and dark results.
For a dependable first design, choose a strong preset, refine the jaw and eyes, select a readable hairstyle, then use makeup and asymmetry as controlled accents.
Related Sea of Remnants Guides
Continue with these Sea of Remnants guides: